Verify an access request, select the correct unit or employee role, and check the saved decision. You can also create and share the application link. In this example, Alex Rivera rents Torre A, unit 101 in fictional Jardines del Lago and requests Resident access. Verify Alex’s residency before approving.
Start with the correct community and authority
- Open Jardines del Lago and confirm its name before changing access. Use an active account authorized to manage this community.
- Open Access requests under community configuration. The Requests view contains applications you can review; Share link manages the application link.
- Check the permissions needed for your task. Managing the link requires community update authority. A limited reviewer may see only requests within their authority and cannot assume they can manage every applicant, create missing units, or change roles.
The community manager’s subscription and the relevant service must allow the relationship you are approving. Creating buildings or units, preparing roles, and giving employee access have separate permission and availability checks. This guide is intended for board members and administrators, but those titles alone do not guarantee access to a control. Use the website for these steps; native availability is explained below.
A shared link lets people apply for membership. They still need account verification and community approval as separate steps. Give applicants the joining tutorial and explain that a reviewer must act before they can enter.
Review and approve a request
1. Find and verify the application
- In Requests, check the Status filter. The initial list is Pending review; choose another status or All statuses when finding an older decision.
- Use Search applicant or claim to find Alex or
101, then choose Review on the intended row. - Check the applicant, community, requested relationship, and Claimed unit / work. For this example, verify that Alex actually lives in Torre A, unit 101 using your community’s established process.
- If identity or the requested relationship is uncertain, contact the applicant through your established process before deciding. A correctly typed unit number does not verify the claim.
2. Select a real home and review the consequences
- Under Select the actual unit, open Choose a unit and use Search units to find the real
Torre A · 101record. Select it and check the building as well as the number. - For a Resident request, read the notice that approval links residency. If the applicant already has a different residency, approval moves it to this selected unit. Confirm the intended move before deciding.
- For Owner, approval assigns ownership of the selected unit and can replace its current owner. For Owner + Resident, review both the ownership and residency changes. Approve tenants as residents rather than assigning ownership to give them visibility.
- If the actual unit is missing, use Create unit or Create building only when authorized and after checking for an existing record. Creating those records is an immediate separate change. If the page says Saved. We could not reload the units. Try again to refresh the selection., retry the refresh rather than create the same unit twice.
- Choose Approve access once only after confirming the selected record and consequences.
On the current website, approval establishes the reviewed relationship without another confirmation from the applicant. Responsibility for the Urbira subscription stays unchanged.
3. Team-member variation
- For Team member, verify the person’s work and complete the employee profile rather than select a home. Review Employee Name, Reference ID, Employee Role, Phone Number, and the applicant email.
- Select an allowed employee role for this community. A board-only role is not an employee role. If you can create roles, review their module permissions and grant only the access the person needs.
- Review Show employee contact info to residents and owners. Enabling it exposes the employee’s phone and email to those audiences.
- If the employee record is inactive, read and explicitly select Reactivate employee before restoring access. This reuses the employment record and history with the current selected role.
- Choose Approve access on the completed employee form. Approving changes the person’s access.
4. Check the saved result
- Return to Requests and change Status to Approved or All statuses. A successful approval can disappear from the default pending-only list.
- Find the same applicant and verify Approved for the intended relationship. Confirm the actual unit or employee role in your community records.
- Ask the applicant to follow My requests and use Open community when available. Check current membership and permissions to confirm access; a delivered notification alone does not verify the relationship.
For Alex, check that residency is linked to Torre A, unit 101. This approval does not assign ownership, record a payment, or grant unrestricted administrator access.
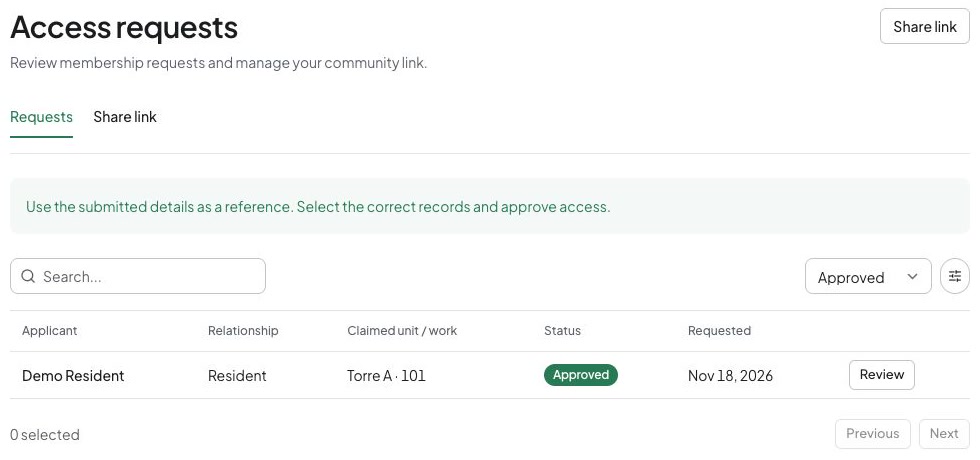
The example administrator list shows an approved Resident request.
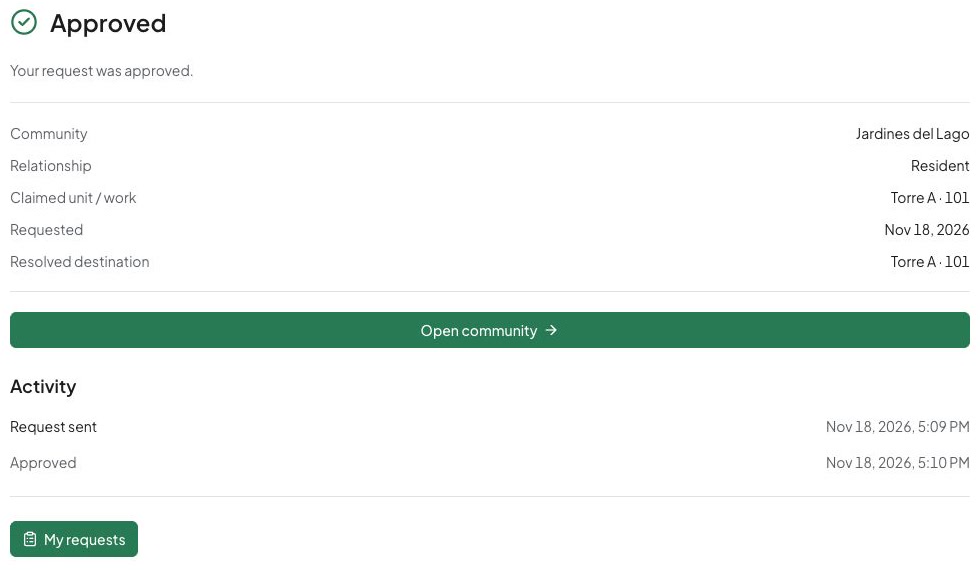
The image below shows the applicant’s approved result. The administrator’s decision dialog is separate. Check the confirmed destination before opening the community.
Decline, block, or revisit
- Choose Decline when the relationship should not proceed. Read the confirmation and choose the appropriate Reason (optional), such as Could not verify the relationship, Wrong community, or Duplicate request.
- Confirm Decline in that dialog. Check Declined using the status filter.
- Choose Decline and block only when you also intend to prevent that account from applying again. Read its explanation and confirm that specific action. This does not remove access the person already has.
- If an account can apply again, use Unblock applicant when authorized, read the explanation, and choose Confirm. Unblocking permits a new eligible application through an active link; the declined request stays declined.
If another session changed the request, refresh it and review the current details and unit selection before deciding. If you close the review before submitting, return to the same request; your selections alone do not complete approval.
If the decision was saved but notifications could not be queued, keep the page open and choose Try again to retry those notifications. Do not assign the person again through another form. If you lost the page and are unsure of the result, find the request and check its status and community records before acting again.
Manage the link and printed materials
Create and share
- Open Share link in the correct community. If no link exists, choose Create request link and wait for Link active.
- Choose Preview page and check the named community. Applicants use this page to request access; approval is still required.
- Choose Copy link and check Link copied. Send the current link through your community’s chosen channel with the approval explanation and joining tutorial.
- Use Download QR code for the image or Download lobby poster for the printable poster. Check the downloaded community name before printing and distributing.
Pause or replace intentionally
- To pause new applications, choose Disable requests, read the effect, and choose Confirm. Check Link paused. Existing members and pending applications are unchanged.
- To accept applications again using the same printed QR, choose Enable requests and check Link active.
- To invalidate the current link, choose Replace link, read the warning, and choose Confirm. Share the replacement and remove old printed QR codes and posters. The old URL stops working.
- Confirm the replacement preview and update every distribution point. Pending requests, current access, and applicant blocks remain in place after replacement.
If copy fails, select the link field and copy it using the browser’s normal copy action. If a download fails, use the displayed retry and verify the current link state first. For a stale-link warning, reload the panel before exporting again so you do not distribute an old version.
Work from mobile when supported
These instructions apply to the website, including a mobile browser. Reviewing and sharing in native apps depend on the installed release and enabled features. Some mobile sharing and export actions open the website. If a native control is missing, your permission may still be unchanged; check the mobile and website guide and use the website for this workflow.
For later structure or role changes, continue with buildings, units, and team setup.