Report the problem in Projects, then keep updates on the same record until the work is resolved. This guide uses the fictional request Entrance light not working at Jardines del Lago. Creating it records a request; it does not dispatch emergency services, approve a contractor or make a payment.
Before you begin
Use the website for these steps. Open Projects in the navigation; creation and detail controls may call the record a Work Order. The native app also uses Projects, with a separate phone workflow.
Check that you can access the community and the record. Homeowners, residents and employees may have different rights to create and view records. Your role alone does not guarantee permission to create, edit, comment or see financial details. If an action is missing, ask an administrator to review your access instead of making a second account.
Before creating a request, check whether someone has already reported the same light. If there is immediate danger, follow the community’s emergency process first. Prepare one clear photo without faces, private documents or access codes.
1. Describe the work and location
- Select the correct community and open Projects.
- Open the creation control to bring up Create Work Order.
- In Title or Subject, enter
Entrance light not working. In Description, explain the exact entrance, the observed problem, when it was noticed, and what needs inspection. Distinguish observations from a diagnosis. - Attach the photo using the description’s attachment control and wait for the upload to finish. You still need to save the work order.
- Under Target, choose the appropriate Target Type. For Unit, select the building and then the unit. For a shared entrance, choose Community Area and the confirmed common area. A record cannot target both a unit and a common area.
If the correct location is absent, ask an authorized administrator to check the community’s building, unit or common-area records. Do not attach the request to a different resident’s unit to get past the selection.
2. Review optional details and save
- Expand Optional Details if you have confirmed information. New forms start with Low priority and Review status. Review Priority and Status, and change them if the case warrants it.
- Add Service Provider, Start Date and End Date only when agreed. Selecting a provider records context; it is not a contract or an instruction to pay.
- Recheck the title, description, location, attachments and any dates. Use the form’s Create Work Order action once and wait for the created confirmation.
- Find and open the saved record in Projects. Record its reference and verify that the description, location and uploaded photo are present.
After saving, confirm who is responsible for the next step through your community’s process. A provider selection, priority or future start date does not mean someone has accepted the work.
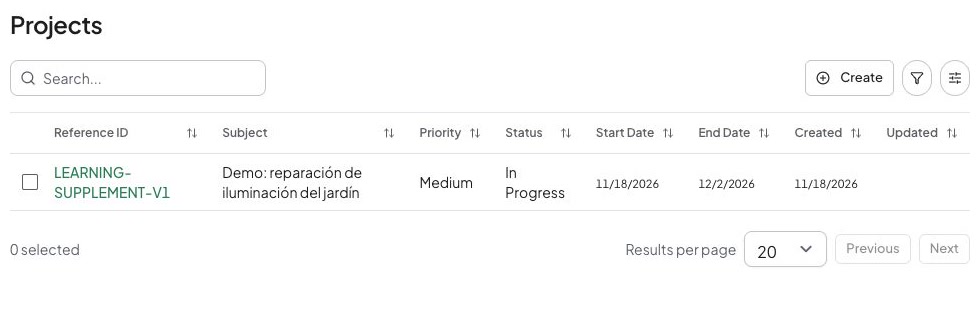
This existing example project is In Progress; it is separate from the new request described above.
3. Add updates and follow the status
- Open the existing record. Read Work Order Information, the Comments section and Timeline before posting a new update.
- When editing is available, choose Edit, correct the information, and select Save Changes. For example, add that a technician inspected the fixture and a replacement is needed.
- If Add Comment is available, describe what happened, what remains, and who should act next. Attach only relevant supporting files. Read any Internal visibility indicator before sharing sensitive information; internal content is restricted to management and authorized staff.
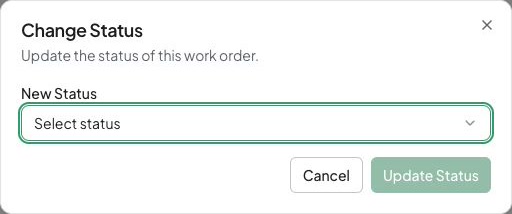
- To record a state change, use Update Status, choose New Status, and confirm Update Status. Available states include Review, In Progress, On Hold, Completed, and Canceled.
- Reopen or refresh the record and confirm the saved state and timeline entry. A comment saying “done” does not itself change the status.
Keep updates on the same record rather than creating a request for every visit. Mark work Completed only after checking the actual result under the community’s process. Completion does not certify payment, settle a linked bill or prove a warranty obligation was fulfilled.
No new status is selected in this dialog, so the update is not submitted.
Costs and provider bills are separate
You need separate permissions to view financial figures, manage estimates or link bills. Assign a service provider before adding their bills. If Manage bills is available, use it to select the provider’s eligible bills to link to this record. Saving replaces the selection, so read any unlink confirmation. Unlinking keeps the bill in Finance. Check currency and amounts in the financial record itself.
Do not enter a payment or approve an estimate merely to make a project look complete. Follow the authorized finance workflow separately.
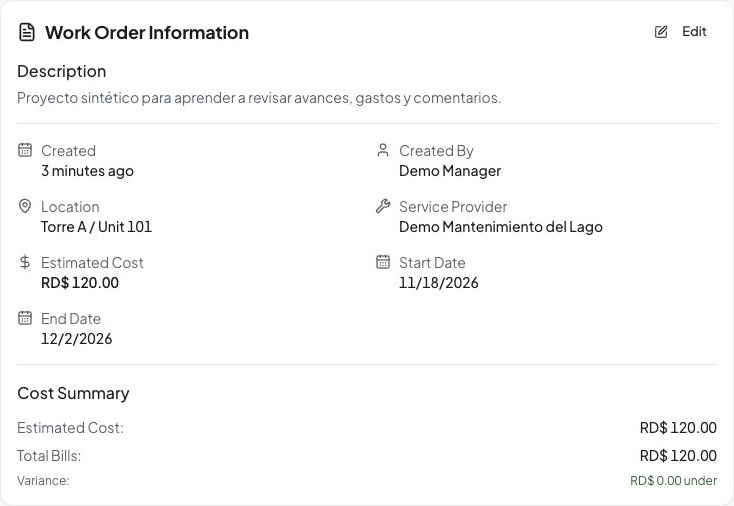
The existing project detail separates work information from its cost summary; neither proves completion or payment.
Check the result and recover
Check that the original record appears in the intended community with the right unit or area. An authorized viewer should be able to open its files, and the status and latest update should match the actual work. A new report can remain in Review.
If something goes wrong, use the current record or form to recover:
| Problem | What to do |
|---|---|
| Validation or upload failed | Correct the highlighted fields, remove unsupported files and retry. Keep the form open: closing it may lose unsaved work. Read the unsaved-change warning before leaving with edits. |
| Connection failed after saving | Check the list and saved detail before creating another record; the request may already be saved. If you are still unsure, give support the reference or title and approximate time. |
| Record or controls are missing | Check the selected community and current permissions. Deletion of an item or its related project, or a revoked assignment, can remove access. Ask an administrator; recreating the record does not restore authorization. |
Continue with projects on your phone or review deletion, archive and retained history before removing a record.