Open Messages to find a conversation or send a first-contact request. The inbox brings together private conversations across your communities. These steps cover the website. To practice, use fictional text and demo participants who have agreed to take part; the illustrated reply is still unsent.
Open your account inbox
- Sign in and choose Messages in the application header or account navigation.
- Check the community badges in the conversation list. You can have a separate thread with the same person for each original community.
- Use Chats, Requests, or Archived to choose the right folder. Use Search conversations and the community filter when needed.
- Select a thread and check the person’s name and community before writing. In the side panel, use Expand messages for more room. Restore or close the panel to change the view.
Private messages support text only. To share attachments, use the appropriate record workflow. Reading an in-app notification is separate from reading the thread. A notification or administrator role does not grant general access to other people’s private conversations.
This inbox shows an existing fictional conversation, not a newly delivered message.
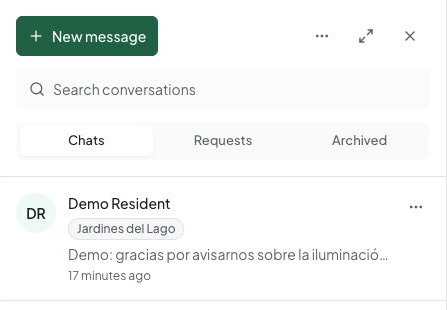
Start a conversation
- Choose New message.
- From the global inbox, choose a community you share with the recipient. A community entry point can already select that context.
- Search eligible members by name and select the recipient. Check carefully if names are similar.
- Write a short first message. For a demo, try “Could we confirm the lobby inspection time?” without personal information.
- Choose Send request once and check the thread for the submitted message and pending-request state.
- Wait for acceptance. Only one first-contact message is allowed until the other participant accepts. Do not try a second request to bypass a declined or pending thread.
If nobody appears, check the community, member eligibility, and whether requests are allowed. If sending fails, keep the draft and use Retry send. If the response is interrupted, check the thread before writing another copy. A message in the thread confirms submission; it does not confirm that the recipient read or accepted it.
Handle incoming requests and replies
- Open Requests and select the request. Read the sender, community, and first message.
- Choose Accept request when you want to converse. Choose Decline to close first contact, or use the blocking control when appropriate.
- After accepting, enter a reply and choose Send. Verify the reply appears in the same thread.
- Return to Chats to find the active conversation. Use Load older messages when available to inspect earlier history.
Declining archives the conversation. The recipient can explicitly use Reopen conversation later; the sender cannot override the decision by creating the same conversation again. The thread can show unread history even when you cannot send messages.
To change your own message, open Message actions. Edit message may be available within 15 minutes of sending; review the text and choose Save changes. To delete it, choose Delete message, read the explanation that deletion cannot be undone, and confirm Delete for everyone. Both actions apply to the selected message rather than the whole thread.
The displayed fictional message is already in the conversation. The empty reply field contains no new message.
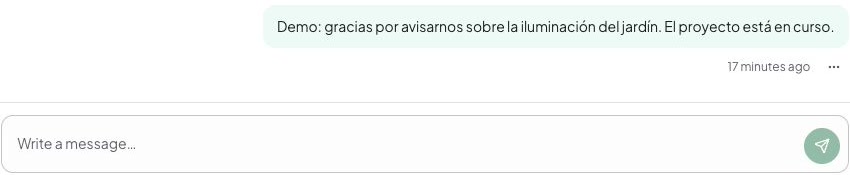
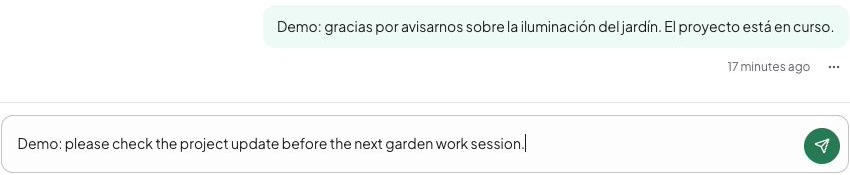
This reply is still an unsent draft. Review the recipient and community before choosing Send.
Choose archive, mute, or block deliberately
- Open the conversation’s options and read the action before choosing it.
- Use Mute conversation to stop alerts while keeping unread information. Unmuting does not replay missed alerts.
- Use Archive conversation to move the thread out of Chats. Open Archived to find it and use the unarchive action to restore its list location.
- Open Messaging settings to review New message requests. Changes save automatically; wait for confirmation. This setting controls first contact and does not apply to all existing conversations.
- Use Block person only after reading its confirmation. Blocking applies across communities and also affects visibility of that person’s content.
To report a received message, open its Message actions, choose Report message, select a reason, and optionally add relevant details. Submit the report and read the confirmation. Reporting shares the selected message and context with authorized safety reviewers; it does not automatically block the person. If Urbira says the report is saved but safety notification failed, use Retry safety notification rather than filing another report.
Understand read-only history and mobile limits
If either participant loses eligibility in the original community, you may still be able to read earlier messages but no longer send. Sharing another community does not reopen the old thread. Read the restriction shown on screen; retrying cannot remove it.
Open Safety history to read available prior conversations and report received messages. It is read-only; the absence of a composer is expected. Check the selected person and community before reporting old content.
Native inbox layout and alert navigation depend on the installed release. If a phone alert opens the wrong place, open Messages manually and select the correct thread. Follow notification recovery for device issues and mobile availability when controls differ. Do not create another account to bypass a block, closed request, or revoked community access.