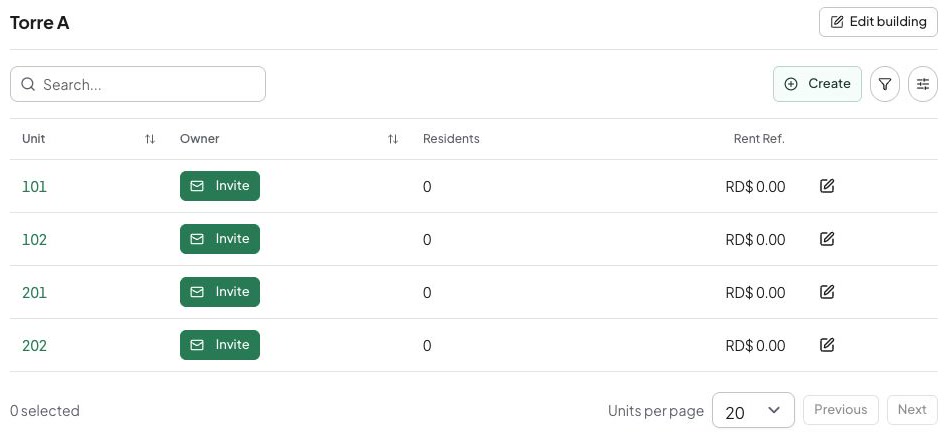
Enter your community details, check the unit list, and confirm the regional settings before creating the community. The example and illustrations use fictional Jardines del Lago, with Torre A, two floors, and two units per floor: 101, 102, 201, 202. Use your own confirmed records.
Before you begin
Use the website with an active account authorized to create and administer the community. Create Community appears in the community workspace only if you have creation permission. If it is missing, ask the account administrator to check your access. Your subscription must allow changes; an expired trial or suspended subscription can block setup. Optional roles also require role management to be available. Manual entry does not use the setup assistant or consume AI requests.
Check whether another administrator already created the community. Homeowners and residents joining an existing community should request access. Creating a community opens a separate workspace. To resolve an access or subscription problem, use your existing account; registering again will not recover access.
Prepare the address, building and unit list, email language, time zone, currency, and number format. You need at least one building, with at least one unit in each. Images and prepared team roles are optional. This tutorial covers creation on the website; it does not cover native apps.
1. Start a manual draft
- Sign in and open Create Community in the community workspace.
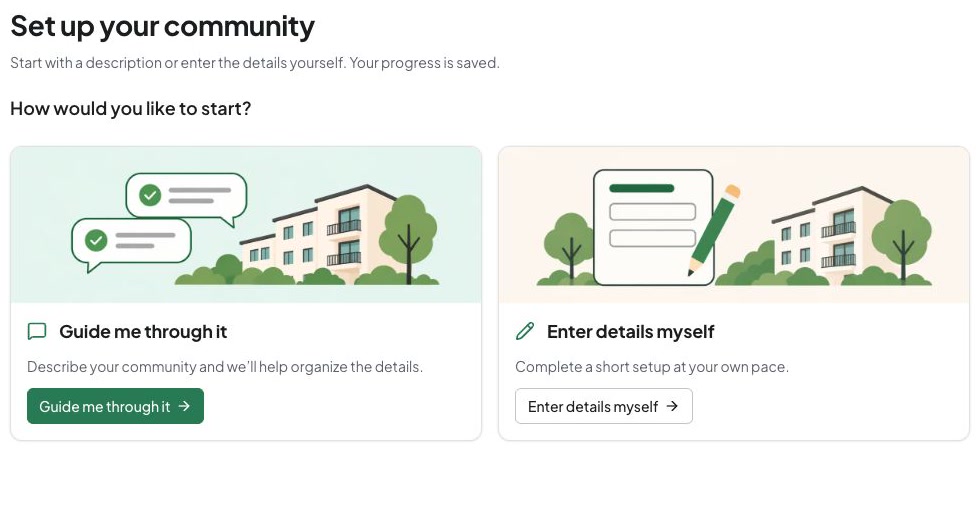
- Under How would you like to start?, choose Enter details myself.
- The draft opens with Community details, Buildings and units, and Regional settings in one form. Scroll down to reach each section.
2. Enter the community details
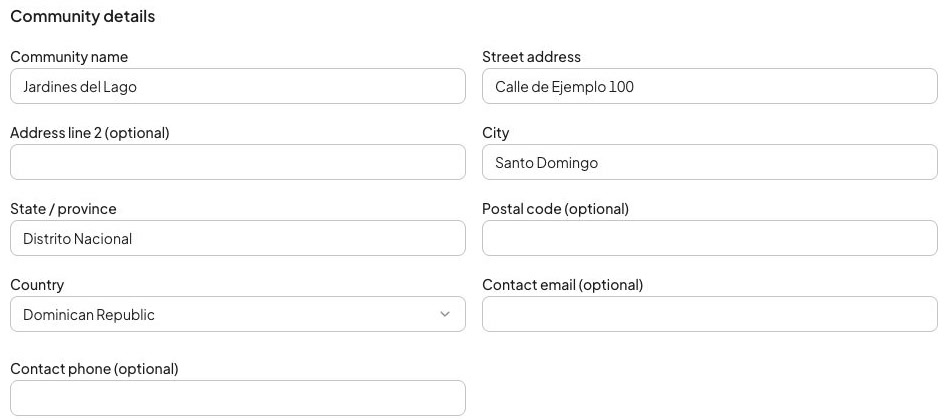
- In Community name, enter
Jardines del Lago. - Complete Street address, City, State / province, and Country with the community’s real location. Our fictional example uses
Calle de Ejemplo 100,Santo Domingo,Distrito Nacional, andDominican Republic. - Add Address line 2 (optional), Postal code (optional), Contact email (optional), or Contact phone (optional) only when useful. A contact address is not an invitation to a member.
- Choose Save progress and wait for Progress saved before taking a break. Saving a draft does not create the community.
3. Build and inspect the unit list
- In Buildings and units, choose Add building if no building is present. Enter
Torre Ain Building name. - Set Highest floor to
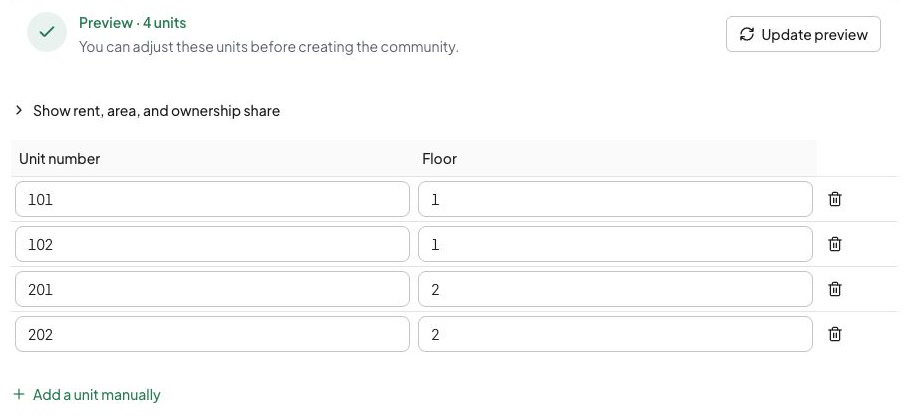
2, Units per floor to2, and Unit naming to Numeric (101, 102, 201). - Choose View units. Check that the preview contains four units:
101,102,201, and202, with the correct floors. - Correct any individual unit before continuing. Show rent, area, and ownership share opens optional unit details. Leave unconfirmed values blank. Entering a monthly rent does not record a payment or create an invoice.
- For another building, choose Add another building and repeat the review. Unit numbering must match your records, not merely the generated pattern.
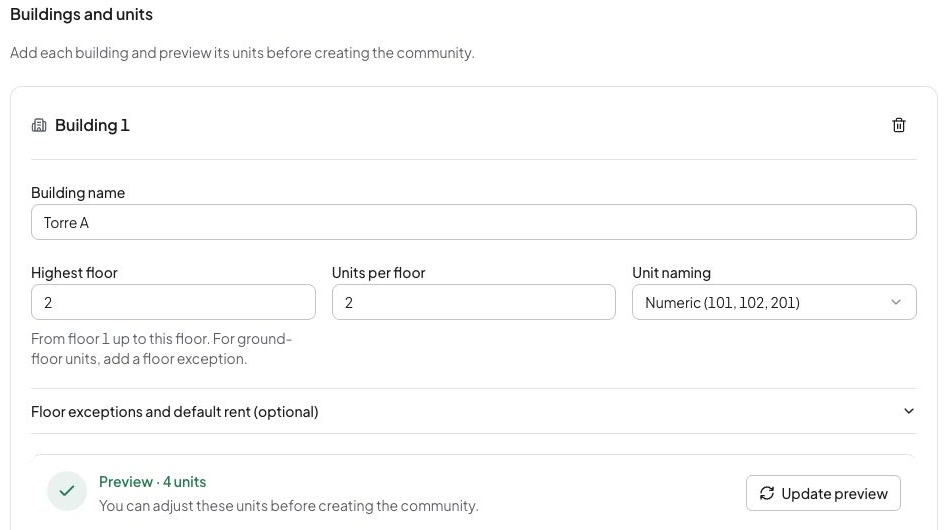
For a different layout, use Floor exceptions and default rent (optional) for confirmed exceptions. Highest floor covers floor 1 through that floor; ground-floor units need a floor exception. Use confirmed labels for special units such as penthouses. Choose Add a unit manually for individual additions. Keep at least one unit in every building.
If you change the layout after previewing, choose Update preview and review the resulting list again. Updating the layout can replace draft unit entries. Read the replacement confirmation before accepting it. Fix duplicate numbers within a building before review.
4. Confirm regional settings and optional setup
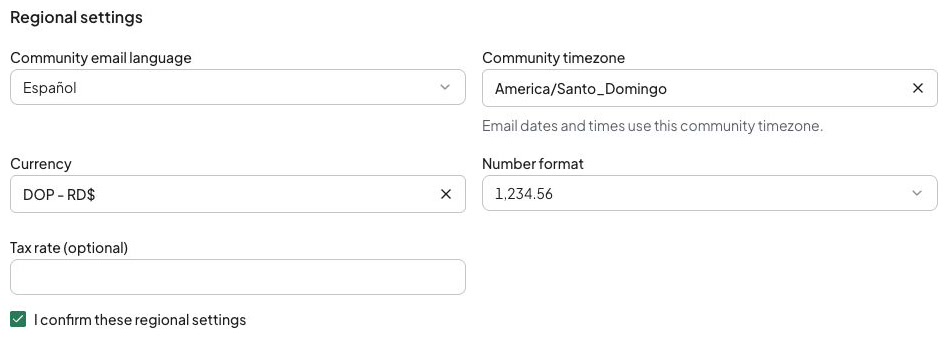
- In Regional settings, choose Community email language. This is the community’s email language, not a request to translate all unit names.
- Set Community timezone to the actual location; for example,
America/Santo_Domingofor a community there. Choose the appropriate Currency, such asDOP, and Number format, such as1,234.56. Do not assume that selecting a country fills these values. - Fill Tax rate (optional) only with a confirmed rate. Check the complete combination, then select I confirm these regional settings. Editing regional values clears confirmation; confirm the revised combination again.
- Optionally add a logo or community photo. Supported files are JPEG, PNG, or WebP, up to 10 MB each. You can finish without images.
- Optionally prepare roles under Who helps manage your community?. Review Adjust permissions if you select roles. Prepared roles start with view access only; additional actions require an explicit choice. Preparing a role sends no invitations and grants nobody access.
5. Review, create, and verify
- Choose Review and create. If a required field is missing or invalid, correct the highlighted field and try again.
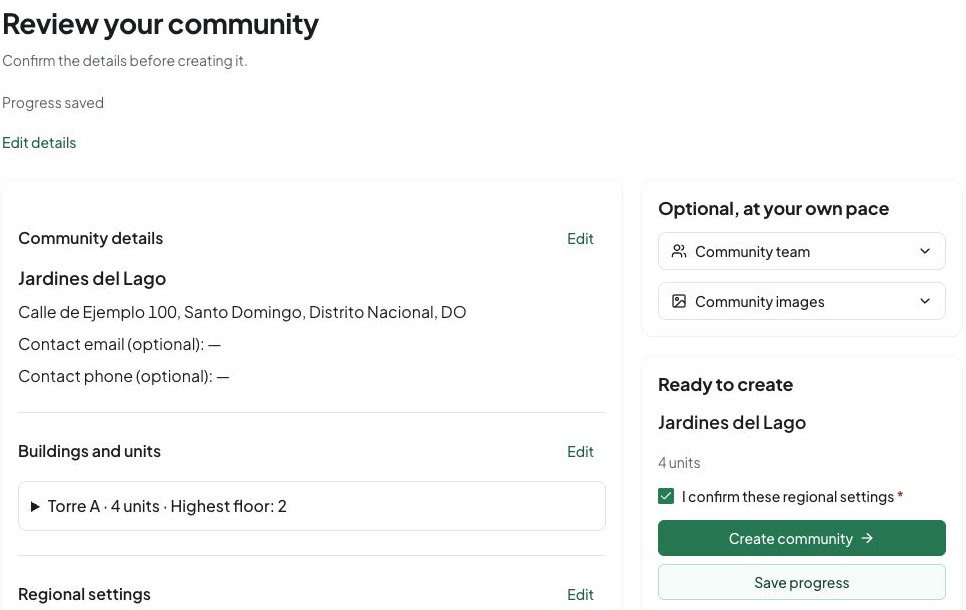
- On Review your community, check the name, address, each building, the complete unit list, currency, time zone, email language, and number format. For this example, confirm Torre A has four units with exactly the numbers listed above.
- Use Edit beside a section or Edit details to correct mistakes. Review again and ensure regional confirmation remains selected.
- Choose Create community once. Wait for Your community is ready and the community name.
- Choose Open community. Confirm that you entered Jardines del Lago. Use People and invitations to continue with units and people, Finances for financial setup, or Shared spaces for common areas.

If Urbira asks you to review its current Terms of Service before entering, read them and enter your full name. Confirm your agreement and choose Accept and continue only if you agree. Creating a community does not complete this separate acceptance step.
You now have a community with the buildings and units you reviewed. Invite or review people next: residents have not joined through this setup, and prepared roles still need people assigned. Opening balances and invoices also need separate setup.
Save, resume, or recover
Pause safely. Edits are saved automatically after a short pause, and Save progress provides an explicit save. Wait for Progress saved. Use Back to start, then find the community under Your saved drafts and choose Resume using the same account. Saved drafts currently expire after 30 days. Each successful save renews that period. Discard draft asks for confirmation and discards its draft files; use it only when you no longer need the work.
Saving failed. Keep the page open: the error says your entries are still there. Check your connection and retry Save progress. Until saving succeeds, do not rely on another browser to recover those edits. If leaving prompts you about unsaved changes, keep editing and save before leaving whenever possible.
Another session changed the draft. Choose Review latest changes, compare Your entries with Latest saved version, select the sections to reapply, then choose Save selected changes. Recheck buildings and regional confirmation. Discard my unsaved changes uses the saved version after confirmation and loses your unsaved edits.
Creation is interrupted. Return to your community list and check whether the community exists before starting a new draft. Finishing the same completed draft again returns its existing community. A new draft can create a duplicate. If the outcome remains unclear, keep the same account and contact support with the community name and approximate time.
Creation is blocked. Check that your account and subscription or trial allow changes. If the block remains, ask the account administrator to resolve access before retrying. If role management is unavailable, remove optional role selections and save, or ask the administrator to restore availability. For field errors, check required address fields, at least one unit per building, duplicate building names, and duplicate unit numbers. If the draft expired or was discarded, check that no community was created before starting a fresh draft from your records.
Continue learning
Learn how access requests are reviewed before sharing your community link. Send residents the join tutorial. For phone use, check mobile and website availability; a phone browser uses the website, while installed native apps have their own supported workflows.