Describe your community to prepare a draft, review the assistant’s suggestions, then choose when to create it. You approve the details yourself. This example uses fictional Jardines del Lago, with one Torre A, two floors, and two homes per floor: 101, 102, 201, 202.
Before you begin
Use the website with an active account authorized to create and administer the community. Your subscription must allow changes, including a current trial when applicable. Guided assistance requires the assistant service to be available; optional prepared roles require role management. The setup chat has a request limit per account and may ask you to wait.
Check whether the community already exists. If you need membership, request access instead. Use your existing account to resolve access problems; creating another account or community will not recover the first. Prepare the real address, buildings, unit labels, and regional settings. The assistant cannot check them against the physical property.
These steps work on the website, including in a phone browser. They do not cover community creation in native apps. If guided help is unavailable, complete the same draft manually.
1. Start a guided draft
- Open Create Community in the application community workspace.
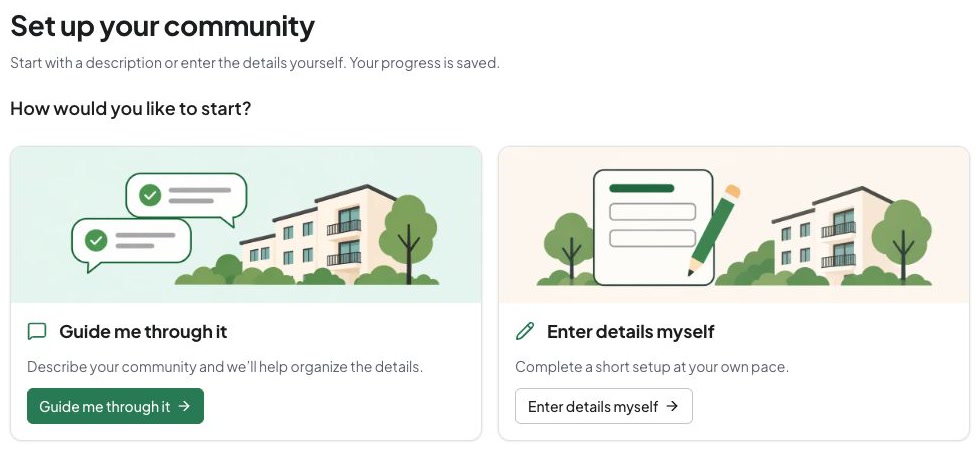
- Under How would you like to start?, choose Guide me through it.
- In Community setup assistant, enter a confirmed description. For example: “My community is Jardines del Lago. Torre A has two floors with two units per floor, numbered 101, 102, 201, 202. There are no ground-floor homes. I will enter the address and regional settings manually.”
- Choose Send once. Wait while Waiting for the assistant or Preparing your answer is displayed.
Include only the information needed for setup. Do not paste a resident roster, passwords, payment records, or private documents into the description. Unknown details can remain incomplete until you verify them.
The start screen offers the guided option for a new draft.
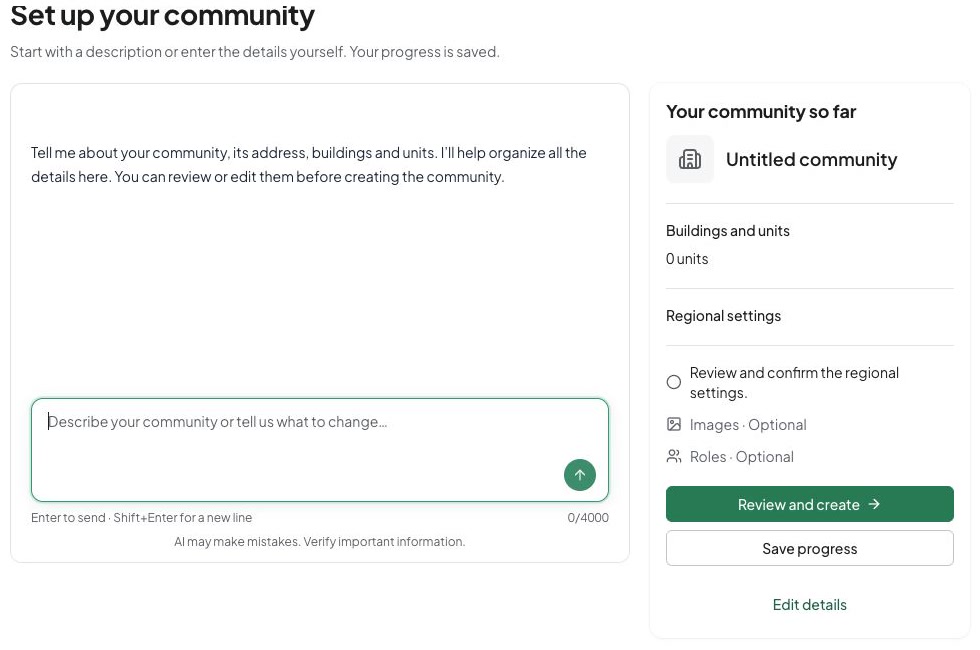
The assistant workspace shown here has an empty preview. No suggestion has been generated yet.
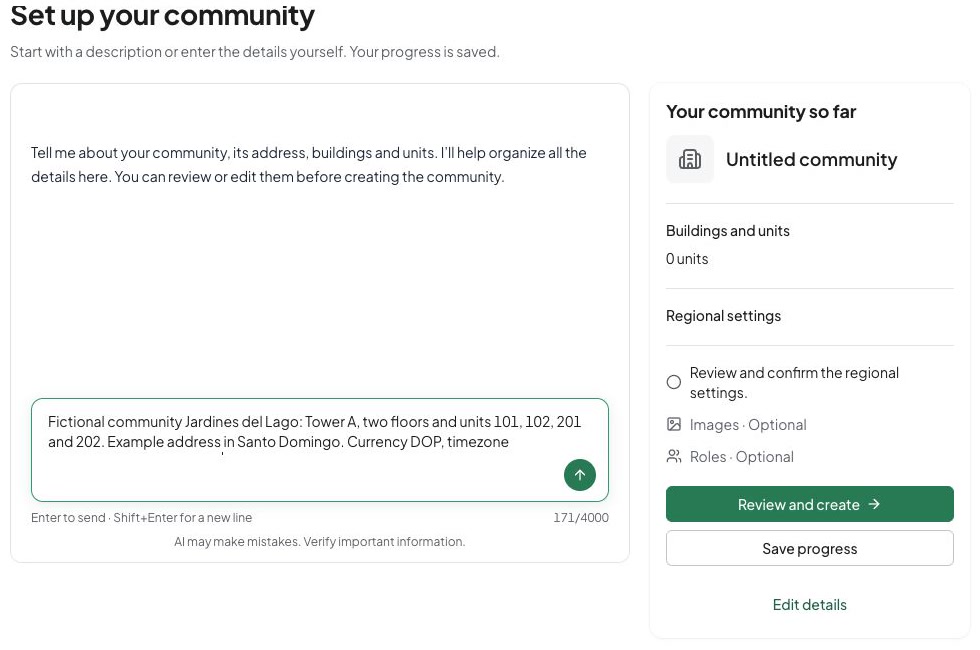
The description shown below has not been sent. The preview is still empty; there is no AI result or created community yet.
2. Read the suggestion before applying it
- Read the assistant’s response. If it asks a question, answer with confirmed facts rather than guessing a layout.
- When a proposed change appears, inspect the named community, buildings, floor layout, and any suggested regional values. The proposal notice means your saved draft has not changed.
- Choose Apply suggestion only when the proposal matches your records. Applying a suggestion changes a draft; it does not create a community.
- Check Your community so far. For the example, confirm one Torre A and a four-unit layout. If a number or floor is wrong, describe the correction or choose Edit details to inspect and change the draft directly.
If a suggestion removes or replaces buildings or unit numbers already in the draft, the interface asks Apply changes to this draft? Read the listed removals before confirming Apply suggestion. Cancel an unwanted replacement and correct the request. After a structural change, recheck any units you edited individually.
3. Complete the actual draft
- Choose Edit details to open the form. Use Edit details manually when that switch is shown. Inspect Community details, Buildings and units, and Regional settings.
- Enter the required name, street address, city, state/province, and country from verified property records.
- Expand the building’s unit preview and confirm all unit numbers and floors. For this example, Torre A needs exactly
101,102,201, and202. Each building must have at least one unit. - Correct numbering, add missing units, or use confirmed floor exceptions when needed. If the layout changes, use Update preview and review the resulting list. The manual tutorial explains these controls in detail.
- Set Community email language, Community timezone, Currency, and Number format yourself. For a property in Santo Domingo,
America/Santo_DomingoandDOPmay be appropriate; use your property’s actual settings. Complete Tax rate (optional) only when confirmed. - Select I confirm these regional settings after checking them. Changing regional values clears the confirmation and requires another review.
- Add optional images or prepared roles only if needed. Images can be added later. Prepared roles grant nobody access and send no invitations; choose additional role actions explicitly.
Choose Save progress and wait for Progress saved. Return to conversation lets you continue guided help from the edited draft. If a subsequent suggestion is inconsistent with a manual correction, do not apply it without reviewing the difference.
4. Review and explicitly create
- Wait for active assistant work to finish and review any messages still waiting to be sent before continuing. A message still queued in the browser is not a saved draft change.
- Choose Review and create. Complete highlighted required fields if review cannot open.
- On Review your community, inspect the name, address, building/unit totals, exact unit list, and regional settings. In this example, check four homes in Torre A. Use Edit or Edit details to correct mistakes.
- Confirm the regional values and choose Create community once. This creates the community records. Chat responses and applied suggestions only prepare the draft.
- Wait for Your community is ready, then choose Open community. Check that the correct community opens. Continue with People and invitations, Finances, or Shared spaces as needed.
The created community has the structure you reviewed. Homeowners and employees still need to join, and optional roles need people assigned. Configure invoices and opening balances separately.
Pause, recover, or finish manually
Resume saved work. Choose Save progress and wait for Progress saved before using Back to start. Sign in with the same account and choose Resume under Your saved drafts. Drafts currently expire after 30 days; each successful save renews that period. Messages waiting to be sent can be lost when you close the browser. Check and save the draft before leaving.
The assistant is still waiting or dispatch failed. Keep the same draft and use Try again on the saved message when offered. This can complete delivery of the existing request. Keep delayed requests in the same draft rather than sending the description again in a new one. If you reach the chat limit, wait before retrying; the limit applies across your account’s drafts.
The assistant could not process the request. You can keep the saved draft and continue manually. Choose Edit details manually and complete the fields yourself. Check the draft before trying the same request again. For other failed responses, inspect the error and draft before choosing Try again, when offered.
Saving failed or another session changed the draft. Keep the page open. Your visible entries may not be saved yet. For a conflict, use Review latest changes, compare your entries with the saved version, and Save selected changes only after reviewing the merge. Recheck buildings and regional confirmation. Discarding unsaved changes requires confirmation and loses those local edits.
Creation was interrupted. Check the community list before starting over. Finishing the same completed draft again returns its existing community. A new draft can create a duplicate. If the outcome remains unclear, contact support with the community name and approximate time, without chat contents or credentials.
After creation, use buildings, units, and team setup for later changes and access review to grant people the right membership.